UART für das myMM32 Board Light
//---------------------------------------------------------------------------
// Title     : simple extern UART Solution, ARM C application in SiSy
//---------------------------------------------------------------------------
// Function  : ...
// Wiring    : ...
//---------------------------------------------------------------------------
// Hardware  : ...
// Clock     : ... MHz
// Language  : ARM C
// Date      : ...
// Version   : ...
// Author    : ...
//---------------------------------------------------------------------------
#include <stddef.h>
#include <stdlib.h>
#include "hardware.h"
void initApplication()
{
	SysTick_Config(SystemCoreClock/100);

	// UART3 RxT an PortD8 9600,8,n,1
	RCC_AHBPeriphClockCmd(RCC_AHBPeriph_GPIOA,ENABLE);
	GPIO_InitTypeDef  GPIO_InitStructure;
	GPIO_StructInit (&GPIO_InitStructure);
	GPIO_InitStructure.GPIO_Pin =  GPIO_Pin_9|GPIO_Pin_10;
	GPIO_InitStructure.GPIO_Mode = GPIO_Mode_AF;
	GPIO_InitStructure.GPIO_OType = GPIO_OType_PP;
	GPIO_InitStructure.GPIO_Speed = GPIO_Speed_2MHz;
	GPIO_InitStructure.GPIO_PuPd = GPIO_PuPd_NOPULL;
	GPIO_Init(GPIOA, &GPIO_InitStructure);
	GPIO_PinAFConfig(GPIOA,GPIO_PinSource9,GPIO_AF_0);
	GPIO_PinAFConfig(GPIOA,GPIO_PinSource10,GPIO_AF_0);

	RCC_APB2PeriphClockCmd(RCC_APB2Periph_USART1,ENABLE);
	USART_InitTypeDef USART_InitStructure;
	USART_InitStructure.USART_BaudRate = 19200;
	USART_InitStructure.USART_WordLength = USART_WordLength_8b;
	USART_InitStructure.USART_StopBits = USART_StopBits_1;
	USART_InitStructure.USART_Parity = USART_Parity_No;
	USART_InitStructure.USART_HardwareFlowControl = USART_HardwareFlowControl_None;
	USART_InitStructure.USART_Mode = USART_Mode_Tx|USART_Mode_Rx;
	USART_Init(USART1, &USART_InitStructure);
	USART_Cmd(USART1, ENABLE);

}

int main(void)
{
	SystemInit();
	initApplication();
	uint8_t data=0;
	do{

		data++;
		USART_SendData(USART1,data);
		waitMs(10);

	} while (true);
	return 0;
}

extern "C" void SysTick_Handler(void)
{
	// Application SysTick
}
//------------------------------------------------------------------------------
Test
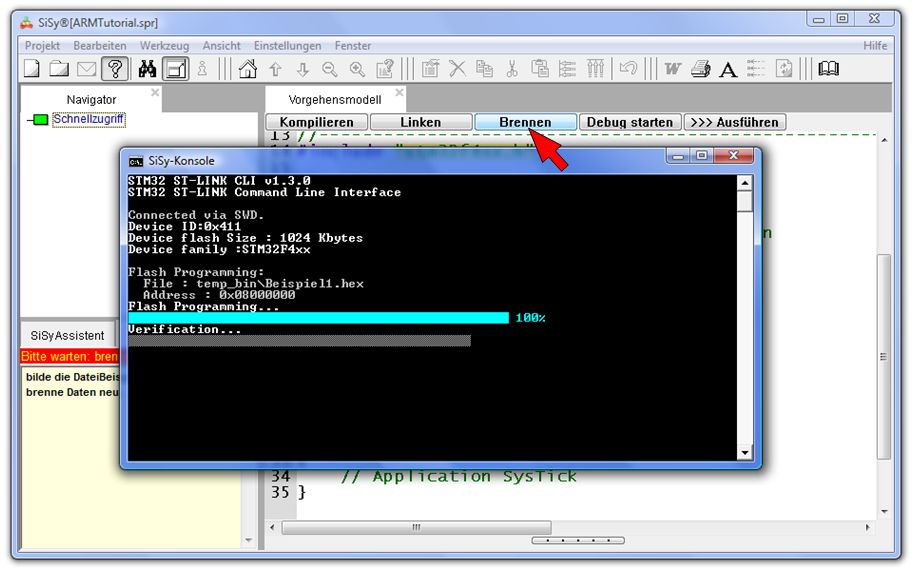
Nutzen sie die Schaltflächen Kompilieren, Linken und Brennen. Die nötigen Verbindungen auf dem Board sind bereits in der Hardware implementiert. Testen Sie die Anwendung.